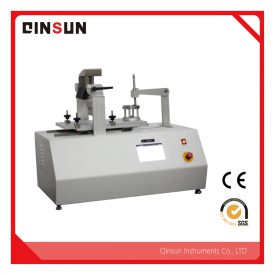
In precision manufacturing fields such as automotive, aerospace, and consumer electronics, the scratch resistance of material surfaces directly impacts product lifespan and user experience. From plastic panels in automotive interiors to protective coatings on mobile phone screens, evaluating the scratch resistance of materials through standardized testing has become a crucial aspect of industry quality control.

The core of scratch resistance testing lies in simulating the physical damage that materials may encounter in actual use using standardized equipment. Multi-functional scratch resistance testers control the material, pressure, speed, and trajectory of the scratch head to create controllable scratches on the material surface. The material's damage resistance is then assessed by quantifying parameters such as scratch depth, width, and color difference.
Taking a tungsten carbide scratch head as an example, its hardness can reach HRA90 or higher, accurately simulating the scratching effect of hard objects such as fingernails and keys on the material surface. During testing, the scratching head traces a straight path across the sample surface at a speed of 10-200 mm/s, with a pressure range covering 2N to 20N, meeting testing requirements from soft fabrics to high-hardness coatings. Some high-end equipment is also equipped with replaceable scratching heads with diameters ranging from 0.5mm to 7mm to adapt to different testing scenarios.
1. Five-Finger Scratch Method: Simulating Multi-Point Contact Damage
This method uses five independently axled scratching fingers, driven by compressed air to achieve uniform linear motion of the testing platform. During testing, the five scratching fingers (made of 16mm diameter polymethyl methacrylate) apply constant pressure perpendicularly to the sample surface, forming five parallel scratches. This technique is particularly suitable for evaluating the localized abrasion resistance of automotive interior plastic parts, such as the scratch resistance of dashboard trim.
Experimental data shows that after a five-finger scratch test under 5N pressure, the scratch depth of a certain brand of automotive interior material is ≤0.05mm with no whitening, indicating that it meets the industry's Class A scratch resistance standard.
2. Cross-cut Test: Quantifying Coating Adhesion
As the gold standard testing method in the coating industry, the cross-cut test involves creating two sets of parallel, perpendicular scratches (typically 2mm apart) on the sample surface, forming 100 squares. After testing, 3M tape is used to assess coating peeling; a peeling area ≤5% is considered acceptable.
An aerospace component supplier improved testing efficiency by 300% and reduced human error from ±15% to ±2% after adopting an automated cross-cut tester. This equipment uses a dual-motor drive system to achieve millimeter-level control of scratch spacing, ensuring test repeatability.
3. Plastic Finger Scratch Test: Precisely Evaluating Soft Materials
For soft materials such as TPU and silicone, a 16mm diameter plastic finger with a Shore D85 hardness is used for testing. A consumer electronics manufacturer discovered using this method that its mobile phone case material produced a 0.02mm micro-scratch under 3N pressure, while after optimizing the formula, the scratch depth was reduced to 0.008mm, significantly improving the product's market competitiveness.
The modern multi-functional scratch resistance tester achieves standardized testing through precision mechanical design and an intelligent control system:
Stroke Range: Adjustable from 10-200mm, covering testing needs from small electronic components to large automotive trim parts.
Speed Control: Stepless speed adjustment from 10-200mm/s, accuracy up to ±1mm/s.
Pressure System: 2N to 20N weight combination, error ≤1%.
Data Acquisition: Built-in high-precision sensors record scratch force, displacement, and other parameters in real time, with a sampling frequency up to 1kHz.
Comparative experiments conducted by a third-party testing organization show that the servo motor-driven device exhibits a trajectory deviation of only 0.03mm during high-speed testing at 100mm/s, while traditional pneumatic equipment shows a deviation of 0.5mm, significantly affecting the accuracy of the test results.
1. Automotive Industry: Rigorous Testing of Interior Materials
Automotive interior parts must pass international standard tests such as GMW14688 and PV3952. A German automaker requires its dashboard materials to have a color difference ΔE ≤ 1.5 between the scratched and unscratched areas after a five-finger scratch test under 7N pressure. By using modified polypropylene materials containing nano-silica, the color difference was successfully controlled to ΔE = 0.8. enhancing the product's premium pricing power.
2. Aerospace: Balancing Lightweight Design and Durability
Aero-engine blade coatings must maintain scratch resistance under high-temperature environments. A certain type of coating material remained intact after 1000 cycles of scratching under 20N pressure and 100mm/s speed testing conditions, meeting the requirements of SAE AS4776 standard and ensuring reliable engine operation in dusty environments.
3. 3C Electronics: Precision Control at the Microscopic Scale
Smartphone screen glass must pass a pencil hardness test (equivalent to Mohs hardness 5-6) and a steel wool abrasion resistance test. A flagship model uses 0.33mm diameter steel wool, which showed no scratches after 1000 rubs under 500g pressure, meeting top industry standards.
Future scratch resistance testing equipment will exhibit three main development directions:
AI Visual Inspection: Integrating high-speed cameras and deep learning algorithms to achieve automatic scratch recognition and grading.
Multi-physics Coupling: Simulating scratch resistance performance under complex environments such as high temperature, high humidity, and corrosion.
Miniaturized Design: Developing handheld devices for online production line inspection and rapid feedback.
A research institution has developed a machine vision-based scratch assessment system that can complete 3D reconstruction of scratch width, depth, and roughness within 0.1 seconds, improving detection efficiency by 50 times compared to traditional microscopy measurements.
From laboratory research and development to production line quality inspection, multifunctional scratch resistance instruments have become an indispensable tool for material performance evaluation. By combining standardized testing methods with precision equipment, companies can not only strictly control product quality but also enhance product competitiveness through data-driven material optimization. With the deepening development of intelligent manufacturing, scratch resistance testing technology will continue to evolve, providing more accurate quality assurance for high-end manufacturing.