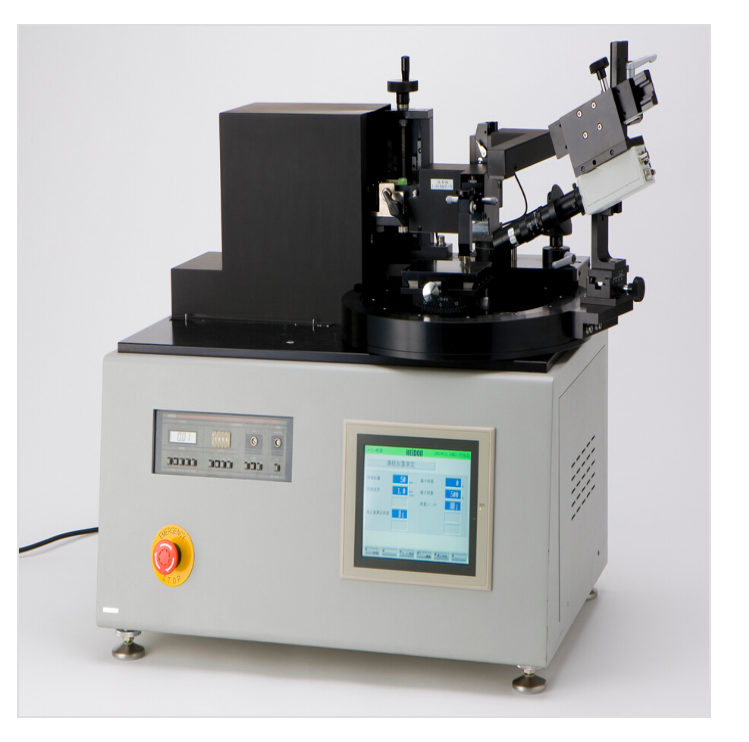
The Load-Controlled Friction and Wear Testing Machine is designed for comprehensive tribological evaluation of materials by combining friction force measurement with displacement monitoring and image recording. Based on conventional friction testing principles, this system enables real-time analysis of friction behavior, wear volume, wear track morphology, and scratch depth, providing a multidimensional understanding of material performance under controlled loading conditions.

Friction and wear characterization of metallic materials
Tribological performance evaluation of plastics and polymer composites
Wear resistance testing of rubber and elastomer materials
Surface durability assessment of coated fabrics and surface-treated components
Lubrication behavior and wear debris movement analysis
Typical test samples include:
Metal specimens (ball-on-disk configurations)
Plastic and composite materials
Rubber and elastomer products
Coated fabrics and surface coatings
Lubricated contact interfaces
When equipped with the optional Friction CCD System, the machine supports:
Wear particle trajectory analysis
Observation of lubricant migration behavior
Visual documentation of wear processes
GB/T 3960-2008 Metallic Materials – Test Method for Friction and Wear (Ball-on-Disk)
GB/T 30770-2014 Tribological Test Methods for Plastics – Part 1: Indentation, Plate-on-Ball, and Sliding Wear
GB/T 6040-2008 Test Method for Wear Resistance of Metal Surfaces
ISO 7148-2 Plain Bearings – Testing of the Tribological Behaviour – Part 2: Ball-on-Disk Wear Test
ISO 4649 Rubber and Elastomers – Determination of Abrasion Resistance
ISO 12137-2 Coated Fabrics – Determination of Abrasion Resistance (Martindale Method)
ASTM D1044 Test Method for Resistance of Transparent Plastics to Surface Abrasion
ASTM D3702 Test Method for Wear Rate of Materials Using a Rotating Drum Apparatus
DIN 50324 Testing of Friction and Wear of Metallic Materials
| Parameter Category | Specification |
|---|---|
| Sliding speed | 0.1 – 50 mm/s |
| Drive motor | AC servo motor |
| Drive mechanism | Gear and rack transmission |
| Sliding distance | Constant load: 1 – 50 mm |
| Variable / continuous load: 10 – 50 mm | |
| Vertical load | Low-load unit: 1 – 50 g |
| High-load unit: 100 – 10.000 g (19.61 N / low-load unit 0.98 N) | |
| Load transducer capacity | 0.98 N / 196.1 N |
| High-load unit range | 10 – 1000 g |
| Worktable size | 120 × 100 mm |
| Worktable operation mode | Single / reciprocating |
| Pre-start mode | Constant load / continuous load switching |
| Safety device | Overload protection |
| Noise suppression | CMRR: AC/DC ≥130 dB, NMRR: AC ≥50 dB |
| Zero adjustment | Digital servo automatic zeroing |
| Output (non-linearity) | 0 to ±5 V (within ±0.05% FS) |
| Sensitivity switching | 0 / 10 / 25 / 50 / 100% FS |
| Dynamic strain amplifier | S/N ratio: 60 dB (maximum sensitivity) |
| Frequency response | 2 kHz / −3 dB |
| Filter | 1 / 10 / 100 Hz low-pass filter |
| Operating environment | 0 – 50 °C, ≤85% RH, non-condensing |
| Power supply | AC 100 V, 50/60 Hz |
| Main unit dimensions | W730 × D490 × H665 mm |
| Extended configuration | W1000 × D520 × H900 mm |
Traditional balance-arm loading structure ensuring high reliability and mechanical stability
Simple switching between constant load and continuous loading modes via touch panel
Automatic numerical load input system replacing conventional manual weight loading
Integrated displacement measurement for wear depth and scratch profiling
Standard configuration includes extended functionality such as Y-direction stage movement
Adjustable-angle moving worktable to support diverse test configurations
(1) Scratch needle
(2) Ball indenter
(3) Rod gauge
(4) Weight set
(5) Power cable (2P/E, 2 m)
(6) Accessory cover
(7) Tool set
(8) Parts box
(9) Operating manual
Secure the test specimen firmly on the worktable.
Select the appropriate loading unit based on the test requirement.
Set sliding speed, load mode, and travel distance via the touch panel.
Adjust the test configuration (ball, needle, or other contact geometry).
Start the test and monitor real-time friction force and displacement data.
Record wear depth, wear track characteristics, and friction behavior.
Analyze results according to the selected standard and test method.
Keep the loading mechanism and guide components clean and free of debris
Inspect sensors and load transducers regularly to maintain measurement accuracy
Replace contact tips or balls when wear affects test reliability
Verify calibration periodically in accordance with laboratory quality procedures
Store accessories properly to avoid mechanical damage or contamination
1. What is the core advantage of this product?
The system integrates friction force measurement, displacement monitoring, and optional image analysis, enabling comprehensive tribological evaluation under controlled load conditions.
2. Are the test results reliable?
Yes. The balance-arm loading structure, servo drive system, and high signal-to-noise amplification ensure stable, repeatable, and accurate measurements.
3. Which international or industry standards does it comply with?
The machine supports test methods defined in GB, ISO, ASTM, and DIN standards related to friction, wear, and abrasion testing.
4. Why is this product important?
Understanding friction and wear behavior is critical for material selection, product durability, and performance optimization in engineering applications.